Our Customer.io integration is currently in Open Beta. As such, the info in this article may change.
| Release Status | Open Beta | Availability | Free |
| Status Page | Customer.io Status Page | Default Historical Sync | None |
| Whitelist Tables/Columns | Unsupported/Unsupported | Default Replication Frequency | Continuous |
| Destination Incompatibilities | None | ||
Connecting Customer.io
Connecting Customer.io to Stitch is a three-step process:
Add Customer.io as a Stitch Data Source
-
Click the Customer.io icon.
-
Enter a name for the integration. This is the name that will display on the for the integration; it’ll also be used to create the schema in your data warehouse.
For example, the name “Stitch Customerio” would create a schema called
stitch_customerioin the data warehouse. This schema is where all the tables for this integration will be stored. - Click .
Generating a Customer.io Webhook URL
Once Stitch has successfully saved and created the Customer.io integration, you’ll be redirected to a page that displays your Customer.io webhook URL and token (which is blurred in the image below):
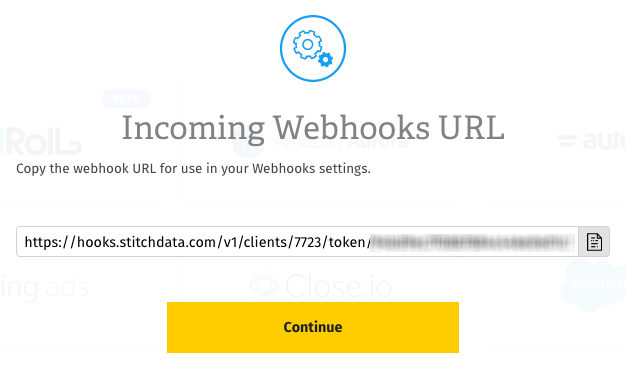
Click the Copy button to copy it.
Note that this particular URL won’t display in Stitch again once you click Continue. Think of this URL like you would your login or API credentials - keep it secret, keep it safe. You can, however, generate another URL should you need it.
Once you’ve copied your webhook URL, click Continue to wrap things up in Stitch.
Setting Up Webhooks in Customer.io
The last step is to setup webhooks in your Customer.io account.
- Sign into your Customer.io account.
- Click Integrations in the menu on the left.
- In the Streaming Data Out section, click the Get Started button next to Email Activity Webhook.
- In the Webhook Endpoint field, paste your Stitch-generated webhook URL.
- Next, you’ll select the Webhook Events you want to track:
- To track specific events, click the Edit Webhook Events link (it’s under the Webhooks Endpoint field) to display the list of events:
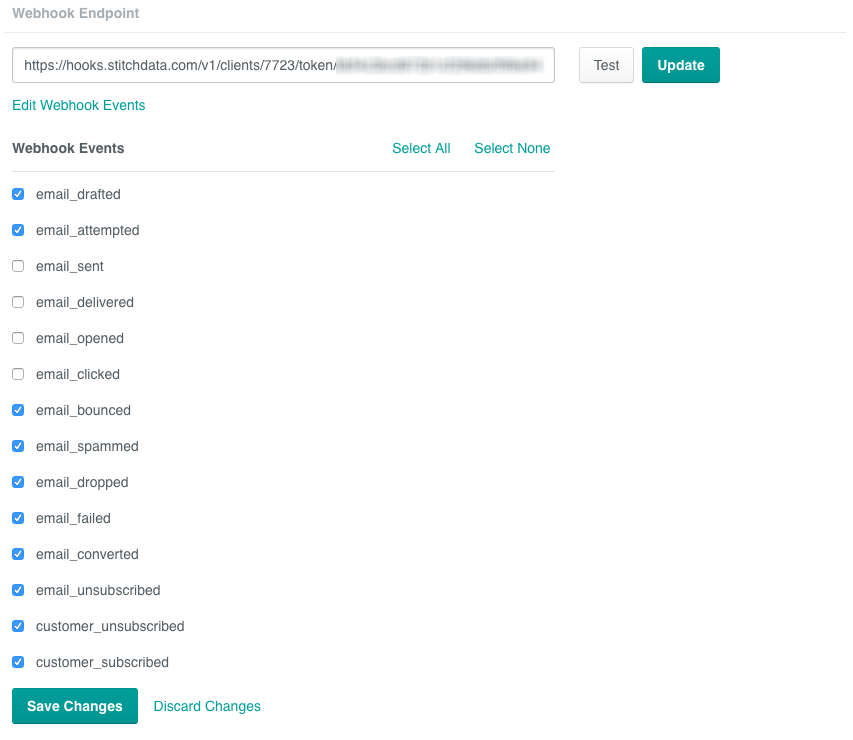
Use the checkboxes to select the events you want to track, clicking Save Changes when finished. - To track ALL available events, you don’t need to do anything else - skip ahead to the last step.
- Click Update.
Testing the Setup
To ensure everything is set up properly, you can send a test call to your Stitch webhook by clicking the Test button next to the the Webhook Endpoint field.
Replication
Schema
In v1 of the Stitch Incoming Webhooks integration, Stitch will create a single table - called data - in the webhook integration schema (this will be the name you enter in the Integration Schema field when you set up Customer.io) of your data warehouse.
The schema of this table will contain two “types” of columns: columns used by Stitch (prepended with _sdc) and the columns sent by the provider’s webhook API.
Aside from the Stitch columns, the schema of this table will depend entirely on Customer.io’s webhook API. With the exception of the _sdc fields, Stitch does not augment Incoming Webhooks data nor does it have any control over the fields sent by the webhook provider.
data
Replication Method: Incremental
Primary Key: event_id
Contains Nested Structures?:
No
data table contains data Attributes
While we try to include everything Customer.io has here, this may not be a full list of attributes. Refer to Customer.io's documentation for a full list and description of each attribute.
event_id
Webhook URLs & Security
Stitch allows you to generate up to 2 Customer.io webhook URLs at a time. These URLs contain security access tokens and as such, have access to your Customer.io account.
If you ever need to change your webhook URL, you can do so in the Integration Settings page after the integration has been created:
- Click into the integration from the page.
- Click the button.
- In the Webhook URLs section, click the Generate Webhook URL button.
- A new webhook URL will display. Press the clipboard icon to copy it.
- Follow the steps in the Setting Up Webhooks in Customer.io section to update the webhook URL in Customer.io.
- After you’ve updated the webhook URL in Customer.io, click the Revoke button next to the oldest webhook URL in Stitch. This will invalidate the token and revoke access.
| Related | Troubleshooting |
Questions? Feedback?
Did this article help? If you have questions or feedback, please reach out to us.