Our Incoming Webhooks integration is currently in Open Beta. As such, the info in this article may change.
| Release Status | Open Beta | Availability | Free |
| Status Page | Stitch Status Page | Default Historical Sync | None |
| Whitelist Tables/Columns | Unsupported/Unsupported | Default Replication Frequency | Continuous |
| Destination Incompatibilities | None | ||
Connecting Incoming Webhooks
Webhooks are a simple, flexible way to keep everyone in the loop. With Stitch’s Incoming Webhooks integration, you have the ability to quickly and easily integrate with dozens of services that use webhook APIs.
Connecting Incoming Webhooks to Stitch is a three-step process:
Add Incoming Webhooks as a Stitch Data Source
- On the Stitch Dashboard page, click the Add an Integration button.
-
Click the Incoming Webhooks icon.
-
Enter a name for the integration. This is the name that will display on the for the integration; it’ll also be used to create the schema in your data warehouse.
For example, the name “Stitch Incoming Webhooks” would create a schema called
stitch_incoming-webhooksin the data warehouse. This schema is where all the tables for this integration will be stored.
Defining the Primary Key
Next, you’ll define the Primary Key for the data that your Incoming Webhooks integration will send to your data warehouse. A Primary Key is a field that’s used to uniquely identify each message in the webhook data.
Primary Keys must:
- Uniquely identify each message in the webhook data
- Have field names with 50 or less characters
-
Be top-level fields. This means that Primary Key fields can’t be part of a nested object or array.
If you need help determining if a field is part of a top-level record, we recommend looking for examples of the JSON record in your app’s API documentation. We’re always happy to help if you still aren’t sure.
Primary Keys & Replication Methods
Defining a Primary Key is optional, but the Incremental Replication Method Stitch uses to update your webhook integration’s data will depend on whether a Primary Key is provided or not.
- If a Primary Key is provided, replication to webhooks data will take place via an upsert. This means that existing rows can be updated.
- If a Primary Key is NOT provided:
- Replication will be Append-Only.
- Stitch will auto-generate a field called
_sdc_primary_keyto be used as a Primary Key. This is because Stitch requires a Primary Key to replicate and de-dupe data.
Additionally, we don’t recommend changing a Primary Key once the integration has been set up and data has replicated. This could result in fields not being updated properly.
Entering the Primary Key into Stitch
In the Primary Key field, enter the name of the field you want to use as a Primary Key. Note that this field isn’t required, but if left blank Stitch will auto-generate a Primary Key instead.
Generating a Incoming Webhooks Webhook URL
Once Stitch has successfully saved and created the Incoming Webhooks integration, you’ll be redirected to a page that displays your Incoming Webhooks webhook URL and token (which is blurred in the image below):
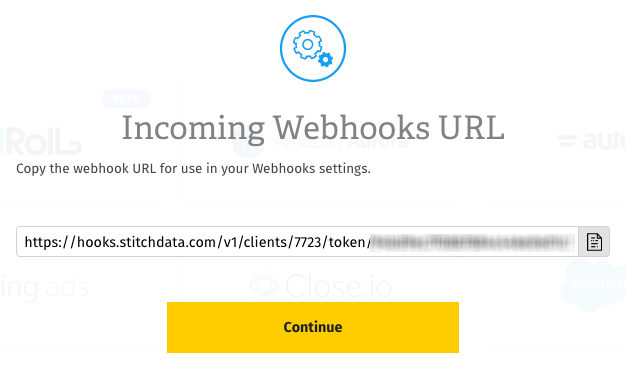
Click the Copy button to copy it.
Note that this particular URL won’t display in Stitch again once you click Continue. Think of this URL like you would your login or API credentials - keep it secret, keep it safe. You can, however, generate another URL should you need it.
Once you’ve copied your webhook URL, click Continue to wrap things up in Stitch.
Setting Up Webhooks in Incoming Webhooks
The last step is to setup webhooks in your Incoming Webhooks account.
Depending on the provider you’re using, the steps for implementing webhooks may differ. We recommend checking out your provider’s documentation for instructions and reaching out to their support team if necessary.
Replication
After you’ve successfully connected your Incoming Webhooks integration, Stitch will continuously replicate your webhook data into your data warehouse.
Webhooks & Historical Data
Because Incoming Webhooks data is sent to Stitch in real-time, this means that only new records are replicated to your data warehouse. Most webhook-based integrations don’t retain historical data due to this as-it-happens approach.
In the event that our webhook service experiences downtime, you may notice some lag between an event occurring and the data appearing in your data warehouse.
Method
This version of Stitch’s Incoming Webhooks integration uses Append-Only Replication. Append-Only Replication is a type of Incremental Replication where newly replicated data is appended to the end of a table. Existing rows are not updated - any updates will be added to the table as new rows. Data stored this way can provide insights and historical details about how those rows have changed over time.
Querying for the Latest Data
If you simply want the latest version of the object - or objects, if you elected to track more than one during the setup - in the integration’s table (data), you’ll have to adjust your querying strategy to account for the append-only method of replication. This is a little different than querying records that are updated using updated_at Incremental Replication.
To do this, you can use the _sdc_sequence column and the table’s Primary Key. The _sdc_sequence is a Unix epoch (down to the millisecond) attached to the record during replication and can help determine the order of all the versions of a row.
If you wanted to create a snapshot of the latest version of this table, you could run a query like this:
SELECT * FROM [stitch-redshift:stitch-incoming-webhooks.data] o
INNER JOIN (
    SELECT
        MAX(_sdc_sequence) AS seq,
        [primary-key]
    FROM [stitch-redshift:stitch-incoming-webhooks.data]
    GROUP BY [primary-key]) oo
ON o.[primary-key] = oo.[primary-key]
AND o._sdc_sequence = oo.seq
This approach uses a subquery to get a single list of every row’s Primary Key and maximum sequence number. It then joins the original table to both the Primary Key and maximum sequence, which makes all other column values available for querying.
Schema
In v1 of the Stitch Incoming Webhooks integration, Stitch will create a single table - called data - in the webhook integration schema (this will be the name you enter in the Integration Schema field when you set up Incoming Webhooks) of your data warehouse.
The schema of this table will contain two “types” of columns: columns used by Stitch (prepended with _sdc) and the columns sent by the provider’s webhook API.
Aside from the Stitch columns, the schema of this table will depend entirely on that provider’s webhook API. With the exception of the _sdc fields (and a Primary Key if one isn’t provided), Stitch does not augment Incoming Webhooks data nor does it have any control over the fields sent by the webhook provider.
data
Replication Method: Incremental Webhook
Contains Nested Structures?:
No
data table contains data Attributes
While we try to include everything Incoming Webhooks has here, this may not be a full list of attributes.
ID (
id)
Webhook URLs & Security
Stitch allows you to generate up to 2 Incoming Webhooks webhook URLs at a time. These URLs contain security access tokens and as such, have access to your Incoming Webhooks account.
If you ever need to change your webhook URL, you can do so in the Integration Settings page after the integration has been created:
- Click into the integration from the Stitch Dashboard page.
- Click the Settings button.
- In the Webhook URLs section, click the Generate Webhook URL button.
- A new webhook URL will display. Press the clipboard icon to copy it.
- Follow the steps in the Setting Up Webhooks in Incoming Webhooks section to update the webhook URL in Incoming Webhooks.
- After you’ve updated the webhook URL in Incoming Webhooks, click the Revoke button next to the oldest webhook URL in Stitch. This will invalidate the token and revoke access.
| Related | Troubleshooting |
|
|
Questions? Feedback?
Did this article help? If you have questions or feedback, please reach out to us.