Our Google Analytics integration is currently in Open Beta. As such, the info in this article may change.
| Release Status | Open Beta | Availability | Free |
| Status Page | Google Analytics Status Page | Default Historical Sync | 30 days |
| Whitelist Tables/Columns | Unsupported/Unsupported | Default Replication Frequency | 6 hours |
| Full Table Endpoints | 0 | Incremental Endpoints | 1 |
| Destination Incompatibilities | None | ||
Connecting Google Analytics
Connecting your Google Analytics data to Stitch is a five-step process:
- Add Google Analytics as a Stitch data source
- Define the Historical Sync
- Define the Replication Frequency
- Authorize Stitch & select a Google Analytics profile to track
- Select metrics and dimensions to sync
Prerequisites
Before you get started, you should verify that:
-
The user creating the integration has at least Read & Analyze permissions and that there’s data in the account. If the profile you use to connect doesn’t have these permissions (or there’s no data in the account), you’ll receive an error message like this:
“Something went wrong. None of the Google Analytics profiles associated with the credentials you’ve supplied contain data that Stitch can access. Please make sure that the credentials you’ve supplied have appropriate access.”
-
All ad-blocking software you are currently using is paused. Because Google authentication uses pop ups, you may encounter issues if ad blockers aren’t disabled during the setup.
Add Google Analytics as a Stitch Data Source
- On the Stitch Dashboard page, click the Add an Integration button.
-
Click the Google Analytics icon.
-
Enter a name for the integration. This is the name that will display on the for the integration; it’ll also be used to create the schema in your data warehouse.
For example, the name “Stitch Google Analytics” would create a schema called
stitch_google-analyticsin the data warehouse. This schema is where all the tables for this integration will be stored.
Defining the Historical Sync
The Sync Historical Data setting will define the starting date for your Google Analytics integration. This means that data equal to or newer than this date will be replicated to your data warehouse.
Change this setting if you want to sync data beyond Google Analytics’s default setting of 30 days. For a detailed look at historical syncs, check out the Syncing Historical SaaS Data article.
Define the Replication Frequency
The Replication Frequency controls how often Stitch will attempt to replicate data from your Google Analytics integration. By default the frequency is set to 6 hours, but you can change it to better suit your needs.
Before setting the Replication Frequency, note that:
- The more often Google Analytics is set to replicate, the higher the number of replicated rows.
-
The number of rows in the source may not equal the number of rows replicated by Stitch. Tables that use Full Table Replication will result in a higher number of replicated rows.
-
Some or all of the tables in Google Analytics have an attribution window. This means that during every replication job, the past 15 days’ worth of data will be replicated. See the Replication section below for more details.
- If you’re using a data warehouses that doesn’t natively support nested structures, you’ll see a higher number of replicated rows due to the de-nesting Stitch performs.
To help prevent overages, we recommend setting the Replication Frequency to something less frequent - like 6 hours instead of 30 minutes. For tips on reducing your row count, check out the Reducing Your Row Count section of our Billing Guide.
After selecting a Replication Frequency, click Save Integration.
Authorizing Stitch & Selecting a Google Analytics Profile
- Next, you’ll be prompted to log into your Google account and to approve Stitch’s access to your Google Analytics data. Note that we will only ever read your data.
- Click Allow to continue.
-
After your credentials are validated, you’ll be prompted to select the Google Analytics profile you want to connect to Stitch:
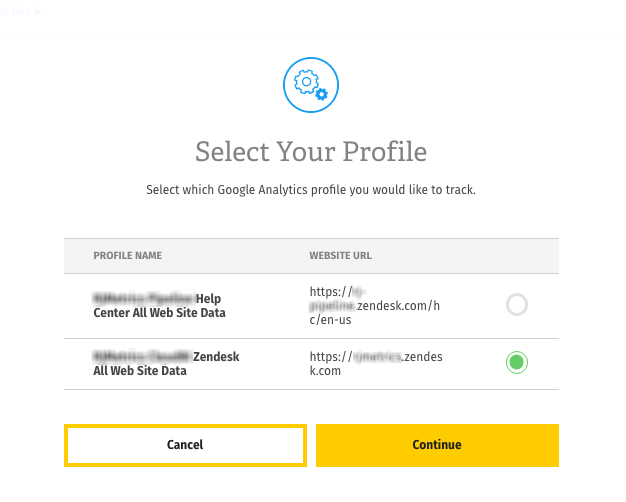
Remember: profiles need to have Read & Analyze permissions to be detected by Stitch. If you don’t see the profile you want in this list, we recommend that you double-check the permission settings.
- When finished, click Continue.
Selecting Metrics & Dimensions to Sync
Now that you’ve granted access to Stitch, you can select the specific Metrics and Dimensions you want to replicate to your data warehouse.
About Replicating Google Analytics Metrics/Dimensions
Before you get started, note the following:
-
Syncing Metric/Dimension combinations is entirely dependent on Google’s compatibility rules. As you add Metrics and Dimensions, Stitch will check for compatibility and display a notification if there are conflicts. Integrations with incompatible Metric/Dimension combos can’t be saved.
We recommend creating additional Google Analytics integrations for different reports if you run into compatibility issues.
Tip: Want to check a Metric/Dimension combo’s compatibility? Use Google’s Dimensions & Metrics Explorer. If the combo is compatible there, it’ll be compatible in Stitch. -
Additionally, the combination of selected Metrics and Dimensions cannot be changed after you save the integration. Because Primary Keys for Google Analytics are composite keys made up of the Dimensions you select, adding or removing anything will change the Primary Keys. Stitch uses Primary Keys to identify new data for replication and prevent duplication.
-
Segments and Filters aren’t currently supported. If you’re interested in us adding these features, please get in touch with us.
Selecting Metrics & Dimensions
-
In the Metrics and Dimensions fields, you can search or use the drop-down to explore your options:
- Click the Metric or Dimension in the menu to add it to the configuration.
-
To add a Custom Metric or Dimension, you need to type out the name exactly in its entirety. If you try to search for it and add a Metric/Dimension that looks like this -
ga:customMetricXX- you’ll run into issues.For example: let’s say you want to add
custom metric 10to the configuration. To add it, you would typega:metric10in the Choose Metrics field like this: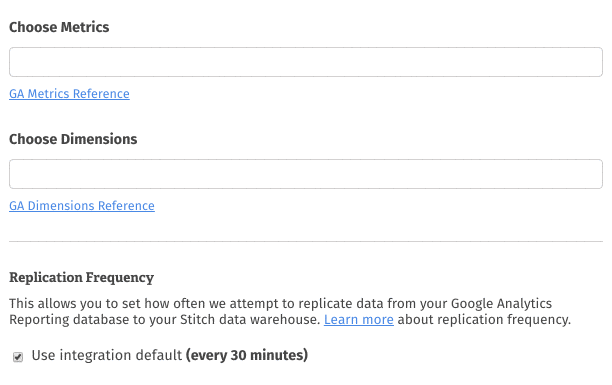
In short, don’t add Metrics or Dimensions that contain
XX. These should always be typed out in full and contain a number instead ofXX. - As you add Metrics and Dimensions, Stitch will check for compatibility. If there are any conflicts, you’ll need to resolve them before you can save the integration. Use Google’s Dimensions & Metrics Explorer as a guide when selecting Metrics and Dimensions.
- Review your selections. Be sure to double-check your work before proceeding.
- When you’re finished, click Save Integration.
Google Analytics’s Intial Sync
After you finish setting up Google Analytics, you might see its Sync Status show as Pending on either the Stitch Dashboard or in the Integration Details page.
For a new integration, a Pending status indicates that Stitch is in the process of scheduling the initial sync for the integration. This may take some time to complete.
Replicating Google Analytics Data
Every time Stitch runs a replication job for Google Analytics, the last 15 days’ worth of data will be replicated.
This is applicable to all tables in the integration.
Stitch replicates data in this way to account for updates made to existing records within the default attribution window of 15 days, thus ensuring you won’t make decisions based on stale (or false) data. As a result, you may see a higher number of replicated rows than what’s being generated in Google Analytics.
Setting the Replication Frequency to a higher frequency - like 30 minutes - can result in re-replicating recent data and contribute to high row counts. Syncing fewer tables or selecting a lower frequency can help prevent overages.
Google Analytics Schema
A single table - called report - will be created in your data warehouse for each Google Analytics integration you create.
The schema of this table will be composed of the Metrics and Dimensions you selected during the setup process and two other columns: start_date and end_date.
If, for example, you selected the following Metrics and Dimensions during setup:
- Metrics:
ga:sessions,ga:pageviews - Dimensions:
ga:referralPath,ga:country
The table would look like the SAMPLE_TABLE below.
Primary Keys
The Primary Key for a Google Analytics table is a composite key made up of the Dimension columns and the start_date and end_date columns.
For example: the Primary Key for the SAMPLE_TABLE would be: referralpath:country:start_date:end_date
Table Rows & Data Pagination
Google Analytics data is paginated on a daily basis. This means that a single row in the report table pertains to a specific day. Use the start_date and end_date columns to identify what day the row is for.
SAMPLE_TABLE
Replication Method: Incremental
Primary Key: referralpath:country:start_date:end_date
Contains Nested Structures?:
No
This is a sample table. The section below contains the real info for the report table that will be created in your data warehouse.
SAMPLE_TABLE Attributes
If the ga:sessions, ga:pageviews, ga:referralPath, ga:country Metrics & Dimensions were selected during setup, the schema of the table would include these attributes:
sessions
pageviews
referralpath
country
start_date
end_date
report
Replication Method: Incremental
Primary Key: dimension_columns:start_date:end_date
Contains Nested Structures?:
No
This is the table that will be created in your data warehouse. The columns in this table will be the Metrics and Dimensions you selected during setup.
Replication & Attribution Windows
Every time a replication job runs for Google Analytics, the past 15 days' worth of data will be replicated for this table. As a result, you may see a higher number of replicated rows than what's being generated in Google Analytics.
Stitch replicates data in this way to account for updates made to existing records within Google Analytics's default attribution window, thus ensuring you won't make decisions based on stale (or false) data.
report Attributes
For more info on the Metrics and Dimensions in Google Analytics, check out their documentation.
Metrics selected by you during setup
Dimensions selected by you during setup
start_date
end_date
| Related | Troubleshooting |
Questions? Feedback?
Did this article help? If you have questions or feedback, please reach out to us.